|
|
|
|
|
|
|
|
|
|
|||||||||||
|
|
|
|
|
|
|
|
|
|
|
||||||||||
|
|
|
|
|
|
|
|
|
|
|
|
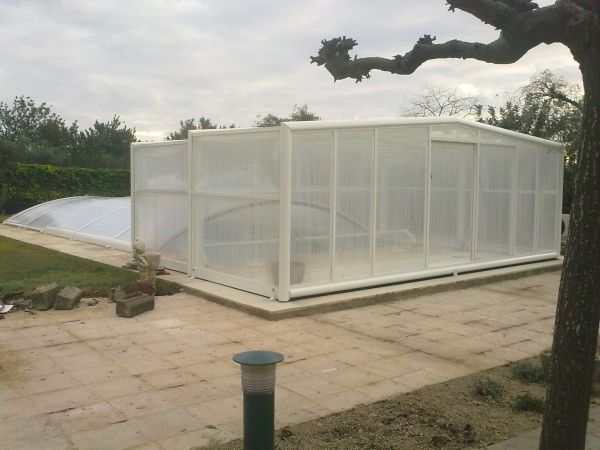
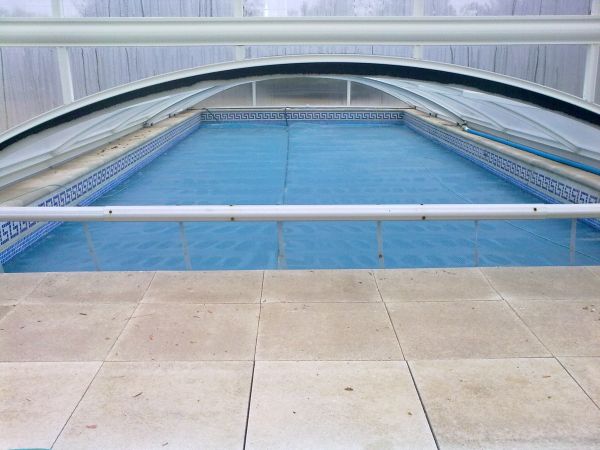
Pool cover
|
|
|
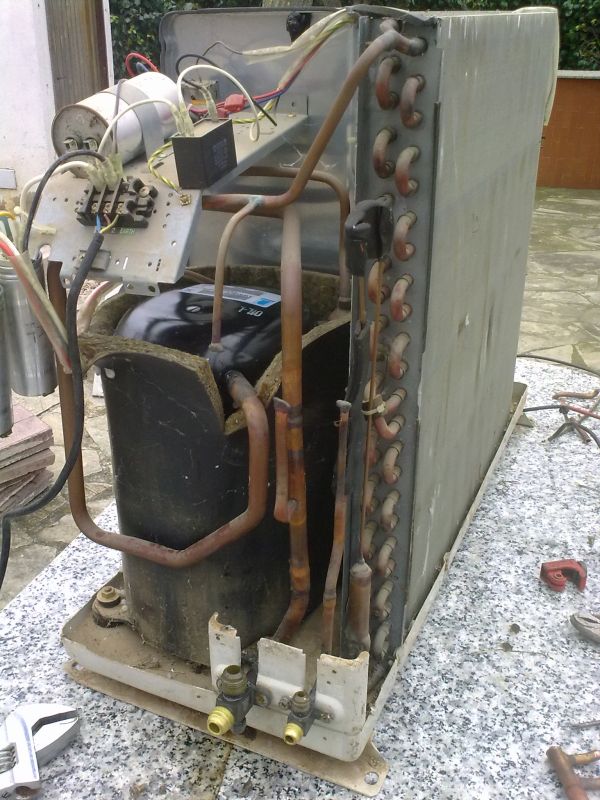
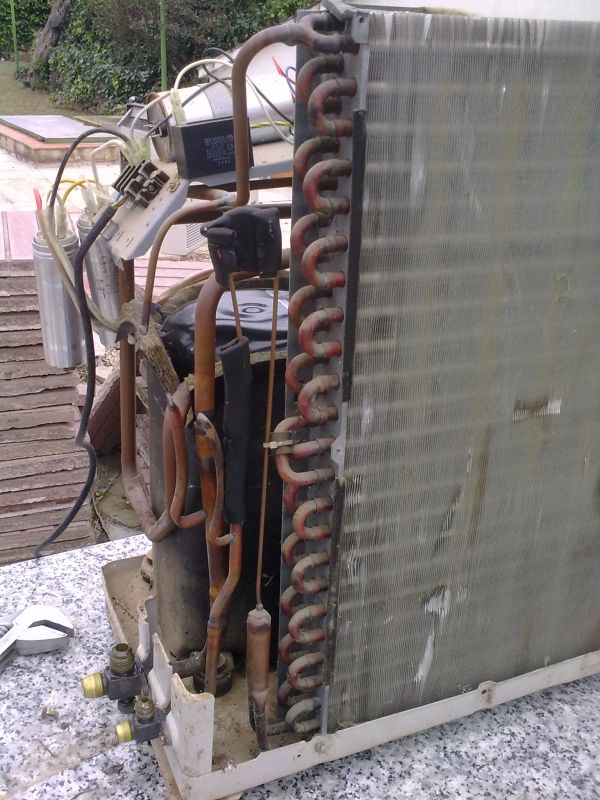
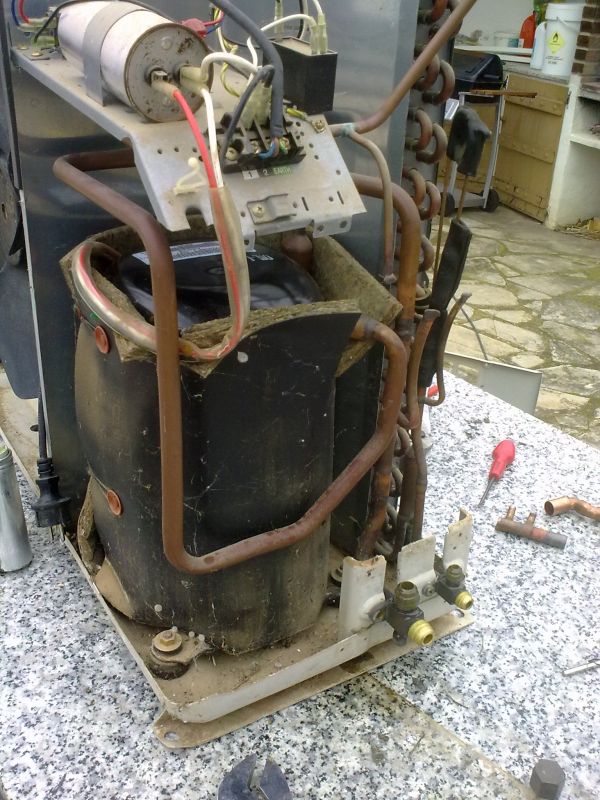
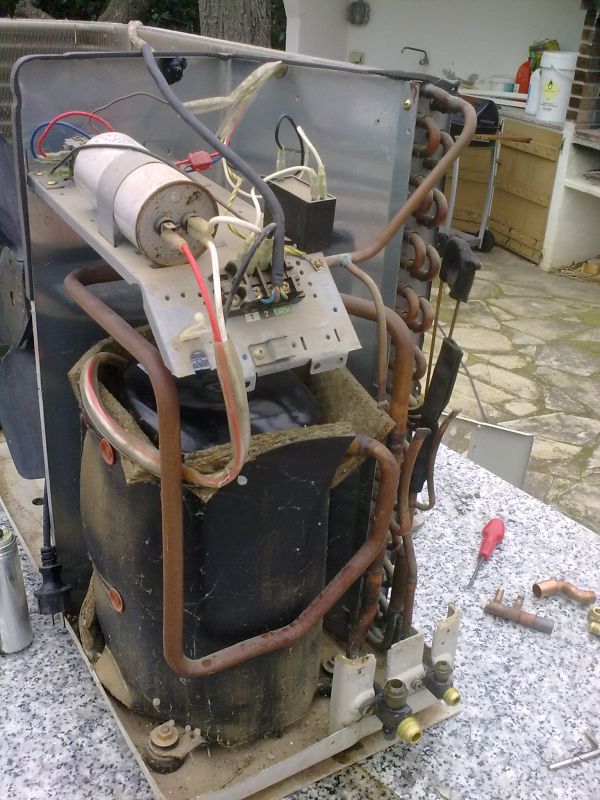
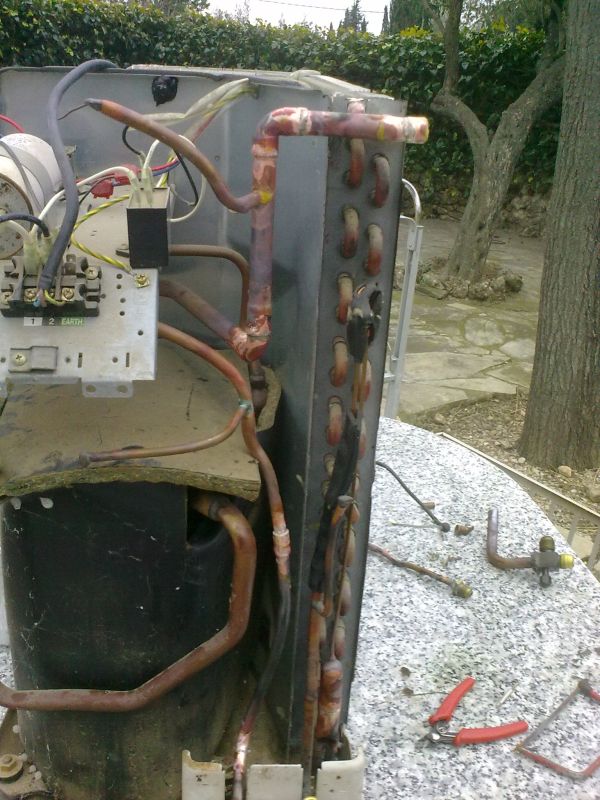
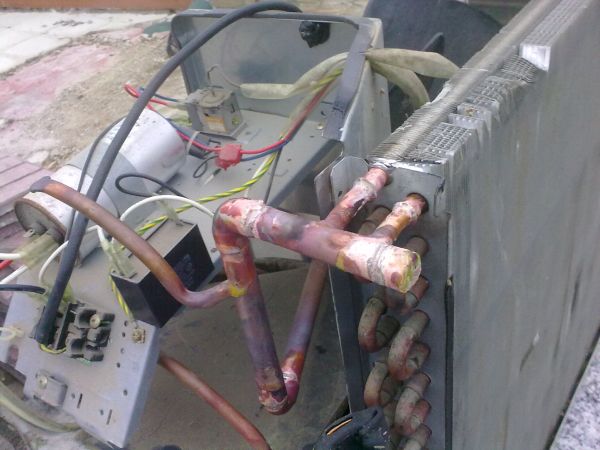
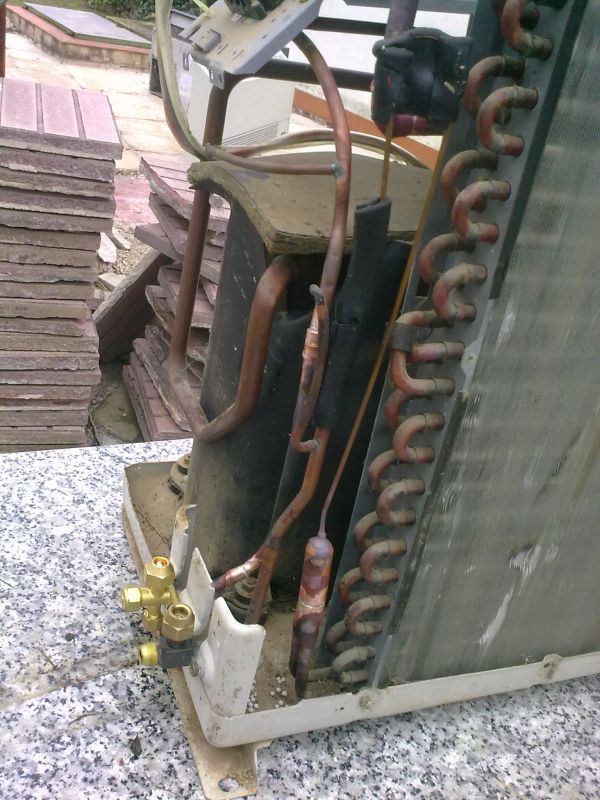
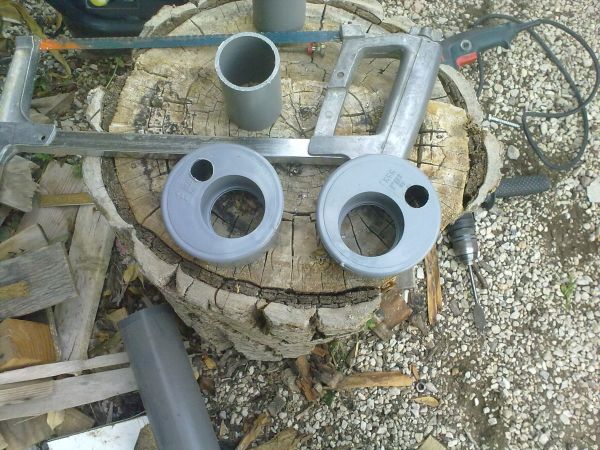
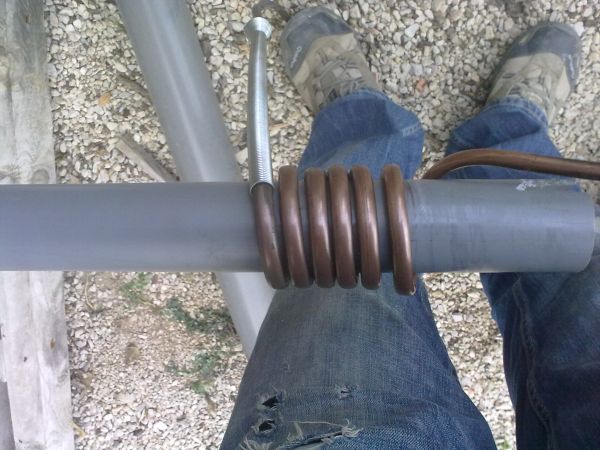
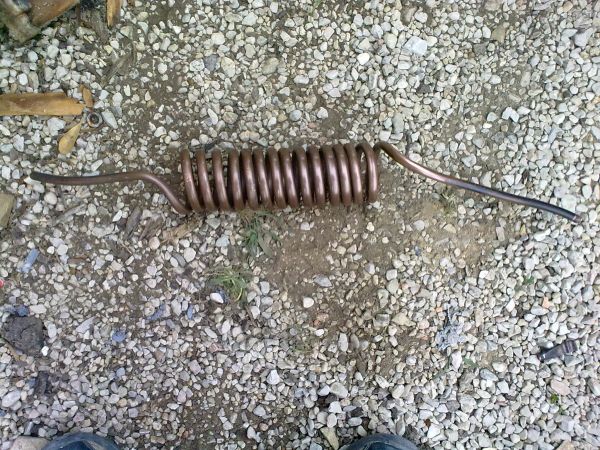
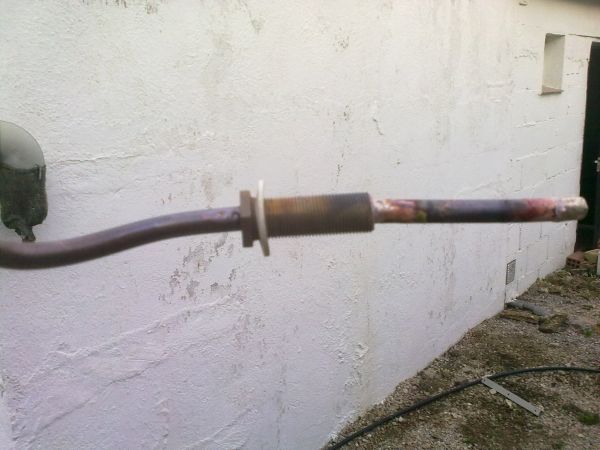
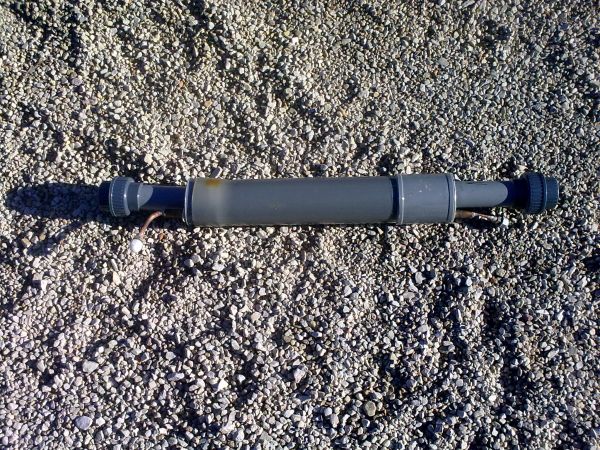
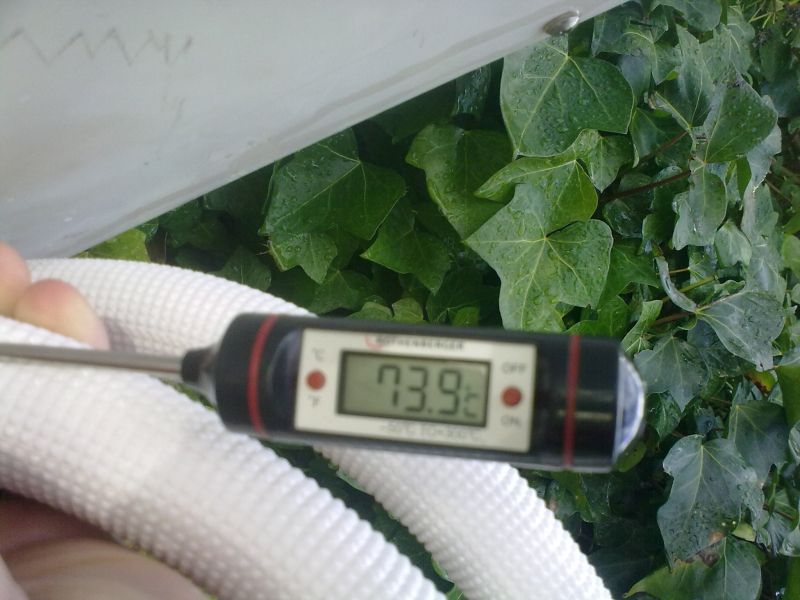
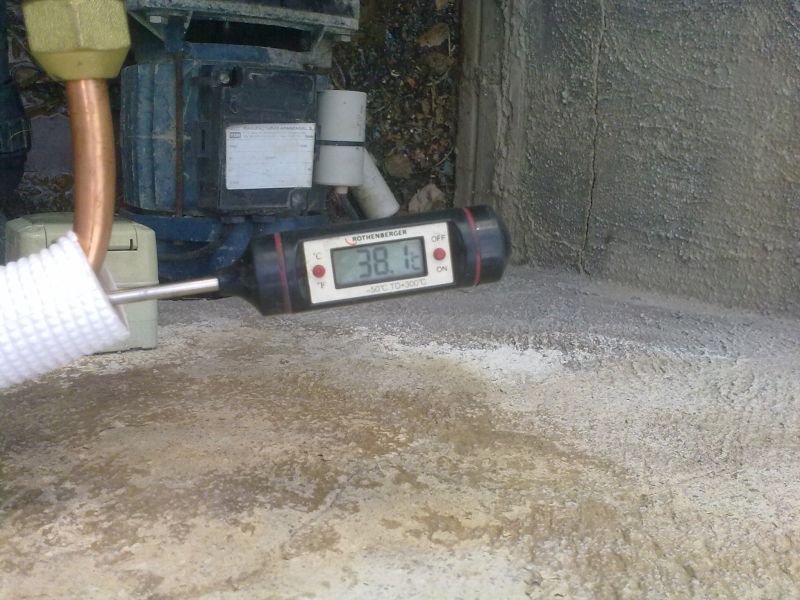
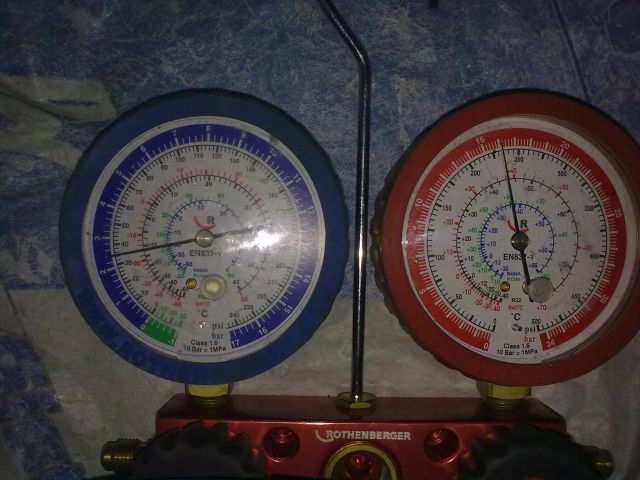
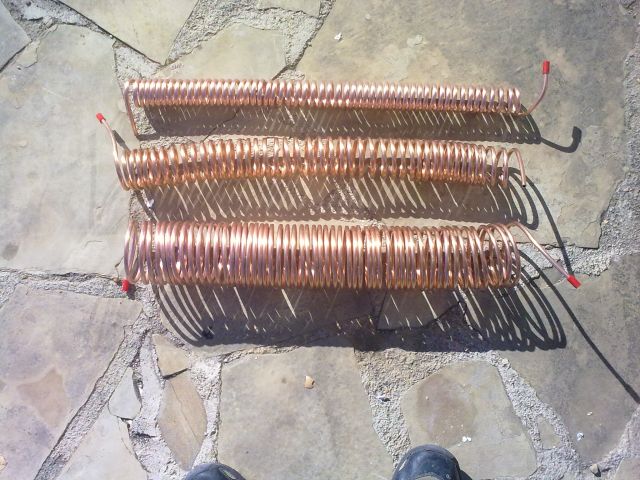
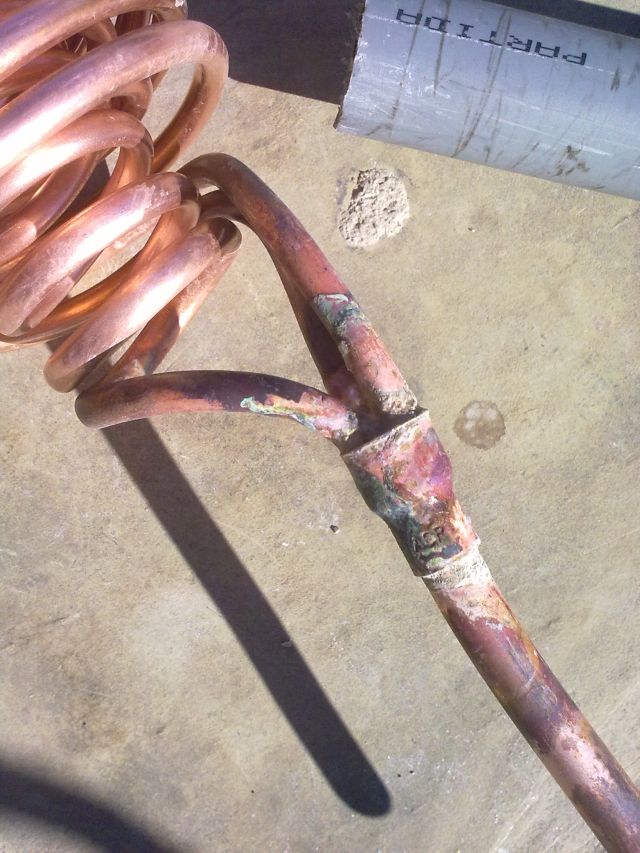
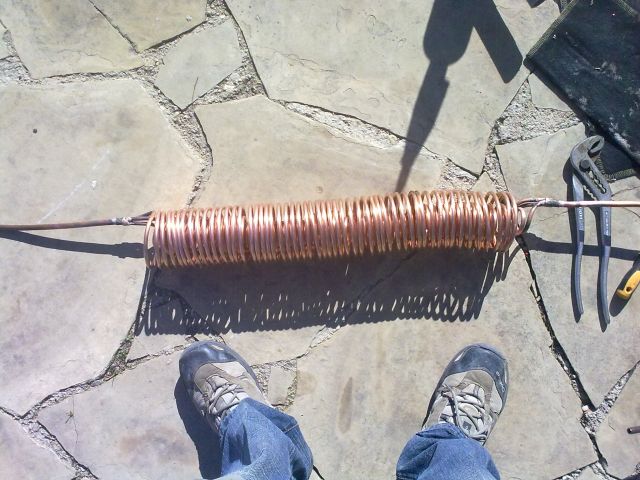
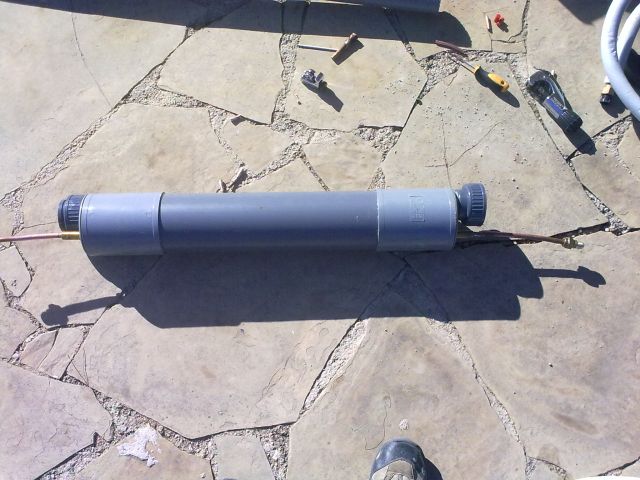
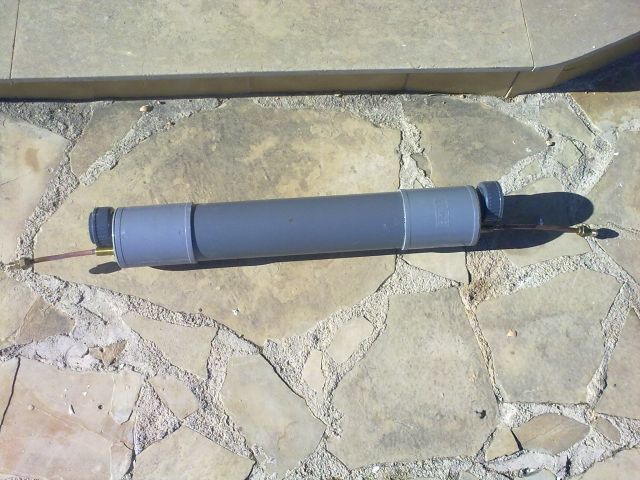
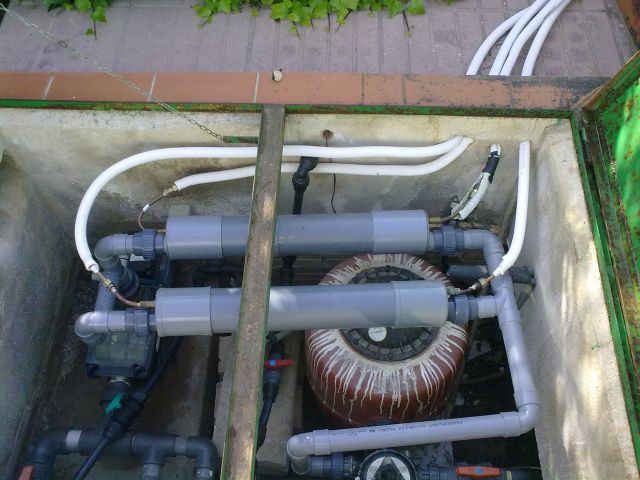
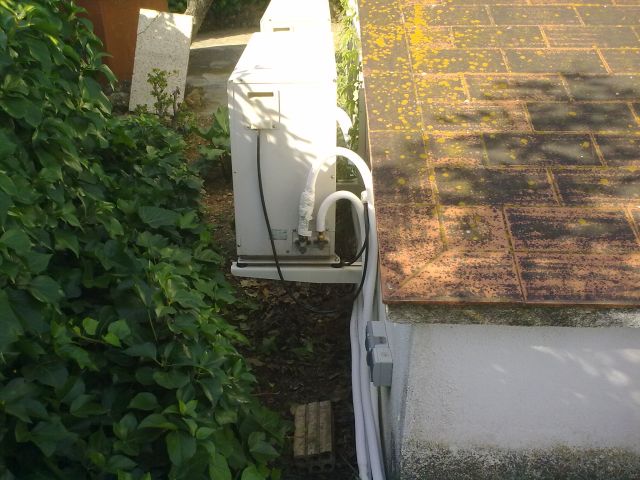
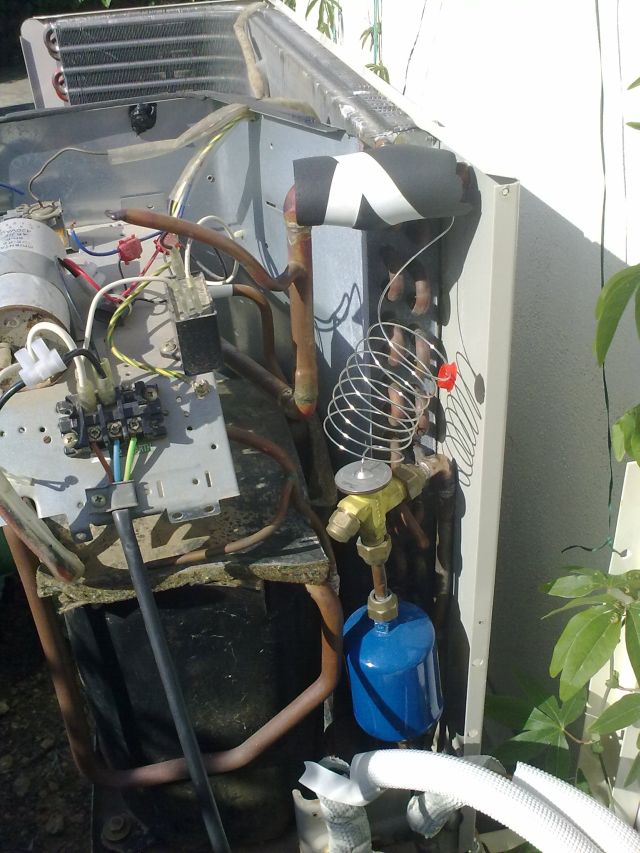
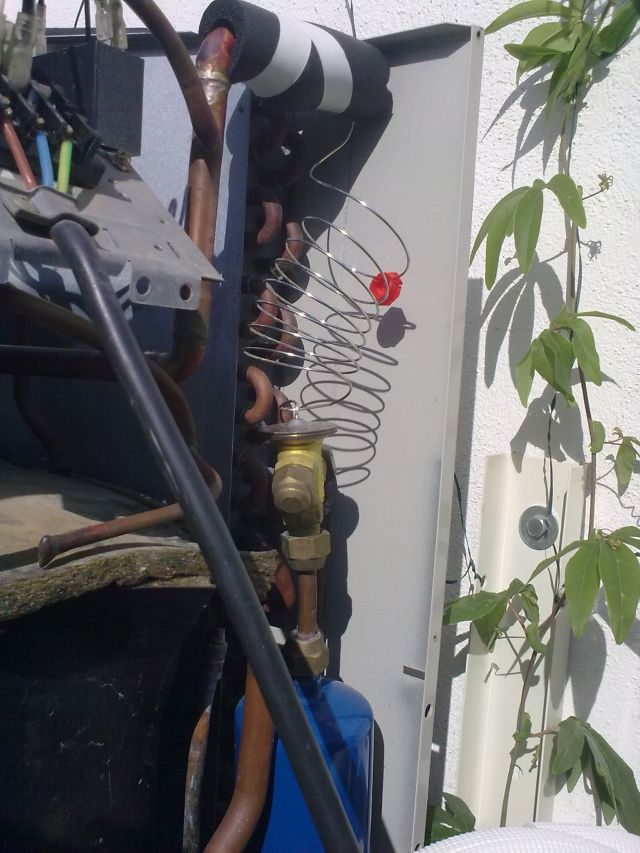
The idea is as follows: The condenser is in the unit; cut the pipes and 're plumb' the pipework to take direct from the compressor out through a 3 port valve and to an external heat exchanger (the new condenser) , back via another valve and through the capillary and into the condenser (which now has becomes the evaporator) and from the 'new' evaporator back to the compressor. The condenser has two circuits through it that are linked at either end. The liquid end I left but the gas end I cut and braised to feed the two tubes into a 1/2" tube to connect back to the gas side of the compressor. The heat exchanger is interesting. I built it from a piece of 90mm soil pipe, 50mm connections on either end for the pool water and with a wound coil inside to take the refrigerant. I have no idea how long this will need to be so as I have limited space I'm just going to size it to fit the space which is about 90cm. The unit fan has been made to run continually at maximum speed to transfer as much cold air away as possible. Cost of project; about 100 euros - cost of a machine from the shop; around 1800 euros + . The pool heated from 15 degrees on 1st January to 25 degrees on 21st January and I went swimming :-) Following the initial tests I decided to build heat exchanger MK2 with extra coils and a larger diameter as MK1 was a bit on the small side. Construction was done using 1/4 inch pipe for the coils and 3/8 pipe for the entry and exit. The basic format was the same but using 110mm soil pipe to incorporate the extra materials. The coils were wound on formers of 32mm, 50mm and 75mm (three pipe diameters I had lying around). The 32 and 50mm coils used roughly 7 metres of tube each, the 75mm was 15 metres - a roll of tube from my supplier is 15 metres, no magic calculations! The individual coils are braised into a 1/2 inch to 3/4 inch reduction as shown in the photo. A slight disaster ensued. I managed to leave a small lump of flux where there should have been solder - result - I dumped all my charge of refrigerant and flooded my machine - oops!!! After much effort purging the water using compressed nitrogen I took the oportunity to:
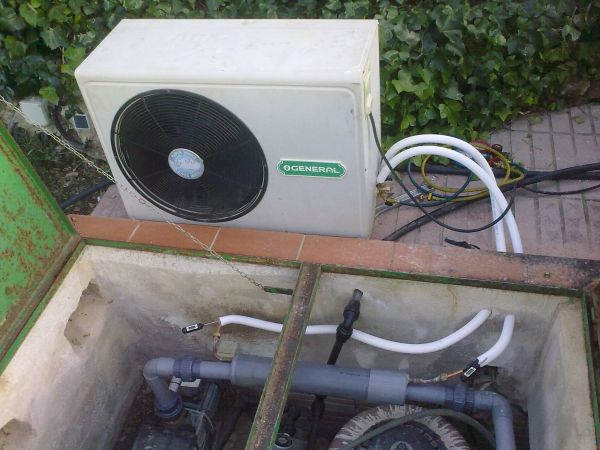
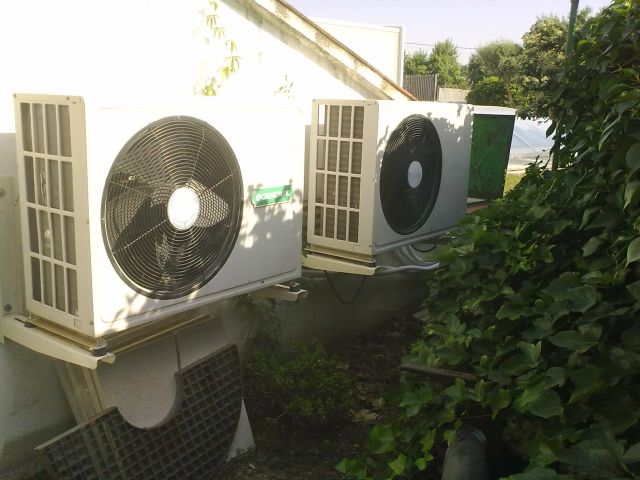
The unit then worked extremely well and the pool heated up .. I then had the good fortune to be given a second unit, not quite identical BUT it was already configured for cooling AND heating! So, I built heat exchanger MK2 No. 2, mounted everything on the wall, tubed up, powered up and that's it, job done! I now have my pool useable 365 days a year.' Total cost of the project, around 500 euros, learning experience priceless! I've just started on my next project - using an electric hot water cylinder as a pre-heater for the central heating system. Removing the heater element and replacing it with a slight variation of MK2 heat exchanger, all mounted inside the tank... more later... |